How to Access Wi-Fi on an Android Phone

Making Wi-Fi work on your Android phone requires two steps. First, you must activate Wi-Fi by turning on the phone’s wireless radio. The second step is connecting to a specific wireless network.
Wi-Fi stands for wireless fidelity. It’s brought to you by the numbers 802.11 and the letters B, N, and G.
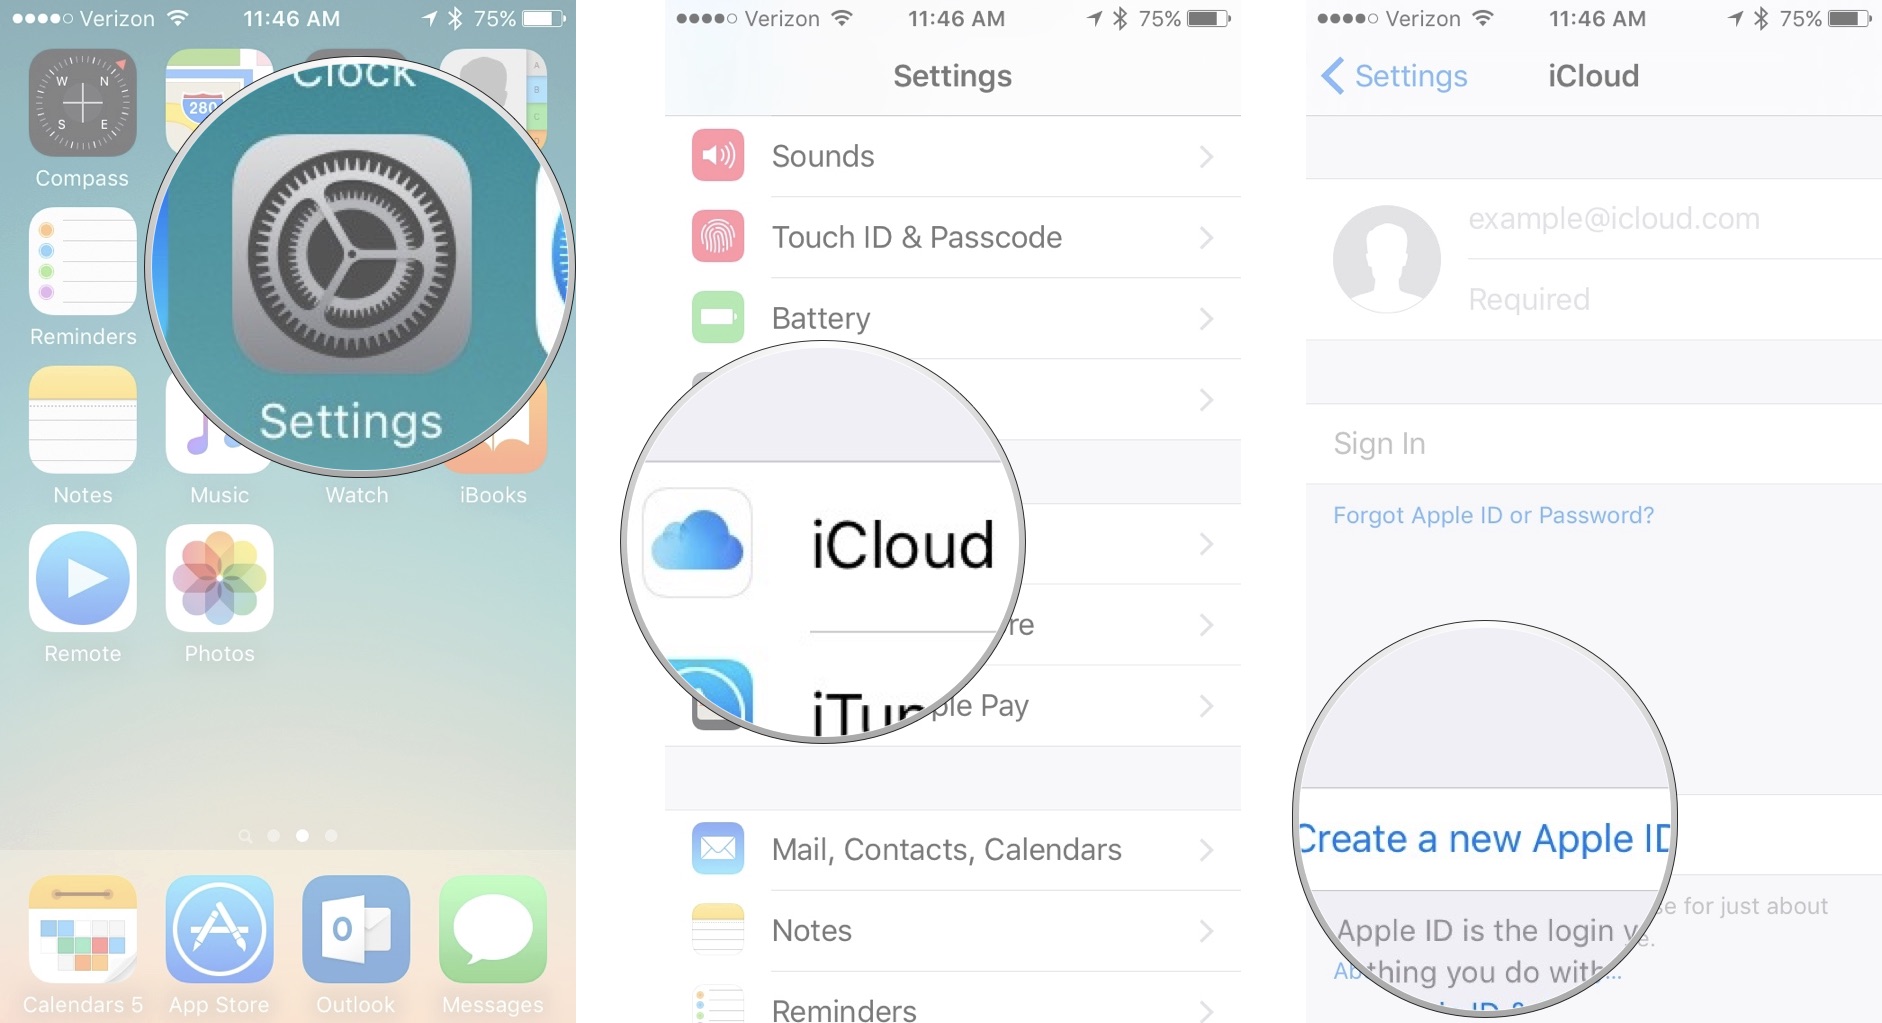
Activating Wi-Fi

Follow these steps to activate Wi-Fi on your Android phone:
  1. At the Home screen, touch the Apps icon.
  2. Open the Settings app.
  3. Ensure that the Wi-Fi master control icon is on.
    If not, slide the master control from Off to On to activate the phone’s Wi-Fi radio.
If you’ve already configured your phone to connect to an available wireless network, it’s connected automatically. Otherwise, you have to connect to an available network, which is covered in the next section.
To turn off Wi-Fi, repeat the steps in this section, but in Step 3 slide the master control icon from On to Off. Turning off Wi-Fi disconnects your phone from any wireless networks.
  • You can quickly peruse your phone’s Wi-Fi settings by choosing the Wi-Fi quick action. See Chapter 3 for more information on quick actions.
  • Some phones may come with a Power Control widget affixed to a Home screen. One of the buttons on that widget is used to turn Wi-Fi on or off.
  • Using Wi-Fi to connect to the Internet doesn’t incur data usage charges.
  • The Wi-Fi radio places an extra drain on the battery, but it’s truly negligible. If you want to save a modicum of juice, especially if you’re out and about and don’t plan to be near a Wi-Fi access point for any length of time, turn off the Wi-Fi radio.

Connecting to a Wi-Fi network
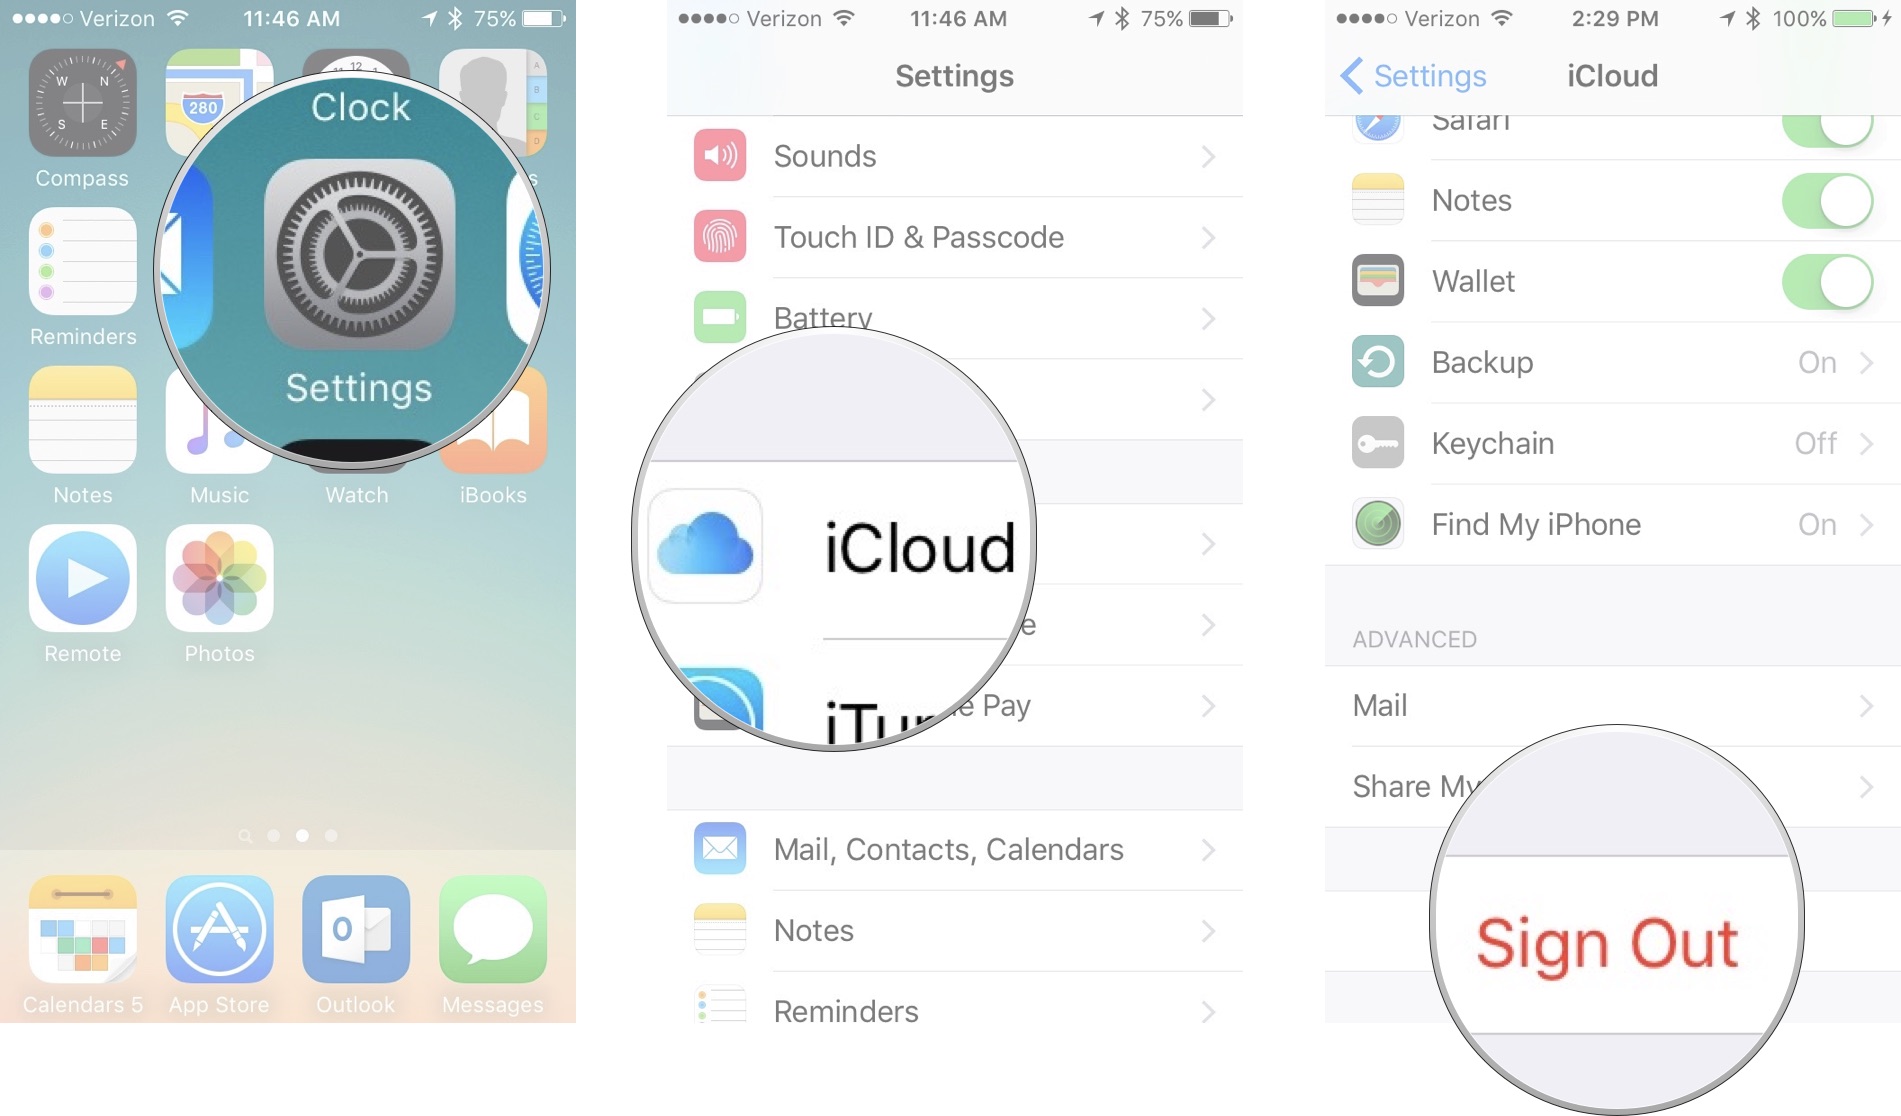
After activating the Wi-Fi radio on your Android phone, you can connect to an available wireless network. Heed these steps:
  1. Open the Settings app.
    It’s found in the apps drawer, but you’ll also find a shortcut in the quick actions drawer.
  2. Choose Wi-Fi or Wireless & Networks.
    Don’t touch the Master Control icon, which turns the Wi-Fi radio on or off; touch the Wi-Fi text on the left side of the Settings app screen.
    You see a list of Wi-Fi networks. In the figure, the Imperial Wambooli network is currently connected.
    image0.jpg
  3. Choose a wireless network from the list.
    When no wireless networks are shown, you’re sort of out of luck regarding Wi-Fi access from your current location.
  4. If prompted, type the network password.
    Putting a check mark in the box by the Show Password option makes it easier to type a long, complex network password.
  5. Touch the Connect button.
    You should be immediately connected to the network. If not, try the password again.
When the phone is connected, you see the Wi-Fi status icon atop the touchscreen, looking similar to the icon shown. This icon indicates that the phone’s Wi-Fi is on — connected and communicating with a Wi-Fi network.
image1.jpg
Some wireless networks don’t broadcast their names, which adds security but also makes accessing them more difficult. In these cases, touch the Add icon to manually add the network. The command might be titled Add Network.
You need to type the network name, or SSID, and specify the type of security. You also need the password, if one is used. You can obtain this information from the girl with the pink hair and pierced lip who sold you coffee or from whoever is in charge of the wireless network at your location.
  • Not every wireless network has a password. They should!
  • Some public networks are open to anyone, but you have to use the web browser app to get on the web and find a login page that lets you access the network. Simply browse to any page on the Internet, and the login page shows up.
  • The phone automatically remembers any Wi-Fi network it’s connected to as well as its network password. An example is the AS_BOARD_ROOM network, shown.
  • To disconnect from a Wi-Fi network, simply turn off Wi-Fi.
  • Unlike the mobile network, a Wi-Fi network’s broadcast signal goes only so far. Use Wi-Fi when you plan to remain in one location for a while. If you wander too far away, your phone loses the signal and is disconnected.

Connecting via WPS

Many Wi-Fi routers feature WPS, which stands for Wi-Fi Protected Setup. It’s a network authorization system that’s really simple and quite secure. If the wireless router features WPS, you can use it to quickly connect your phone to the network.
To make the WPS connection, touch the WPS connection button on the router. The button is labeled WPS or sports the WPS icon. On your phone, visit the Wi-Fi screen in the settings app. Touch the WPS icon to connect to the network.
image2.jpg
If the WPS router requires a PIN (Personal Identification Number), touch the Action Overflow icon on the Wi-Fi settings screen and choose the WPS Pin Entry item.
image3.jpg

How To Master Reset A Mac To Its Original Factory Settings

How to master reset a Mac is a very common question that many Mac have, especially before selling their Mac or handing it over to somebody else. It is always safe to remove the personal data before selling your Mac so that no one else can access your data. Also, a clean Mac OS X looks better to the buyer. So, how to restore macbook pro or Macbook Air is a very important topic that the Mac users keep searching on the internet. By following our guide you can easily restore Mac to factory settings without any hassle and without the help of any technician. Factory reset will bring your Mac to the same state as it was when you bought it, by wiping all the data.
If you want to use Back to my Mac software to transfer files, click here. The method is provided with step by step process.

Steps To Restore Mac To Factory Settings

Before you proceed with the factory reset procedure, make sure that your Mac is connected to the Internet so that you can download the latest Mac OS X copy.

Clone The Hard Drive Of Your Mac

Restore Mac to factory settings wipes out all the data, so the data should be transferred from the old Mac to some other place so that you can restore your new Mac. The best idea is to make a clone of the whole hard drive and keep it safe for the time being, later you can restore your new Mac. For that you can use SuperDuper orCarbon Copy Cloner program with an external storage (hard drive). Choose the main hard drive in Source and external hard drive in the Destination. Now, you will have to click on Clone button, which is placed at the bottom right corner.
Later, you can boot from the cloned hard drive (external). To make sure that this is possible, reset your Mac and keep holding the Option while booting. Select external drive using the arrow keys on your Mac and hit Enter.
You can re-clone the cloned drive to the main drive if you want to restore your Mac or access the files from your computer after the data is removed from the internal hard drive.

De-Authorize ITunes

The next step is to de-authorizing from iTunes to remove the connection between your computer and iTunes account. Maximum of five Macs that are locked to your iTunes account can be used to play movies and music. For that, launch iTunes > Store > De-authorise this Computer. Provide your Apple ID, password and then click on De-authorise.

Turn FileVault Off

FileVault encrypts all the files on the hard drive, it is suggested to turn this option off before you proceed with thefactory reset macbook pro as security is not a concern here. To turn this option off, head to System Preference > Security & Privacy > FileVault. Now check if it says FileVault is off for the main drive, if not, then you have to click on the padlock icon which you will find at the bottom left. Type in your password and click Unlock. Next, you have to click on the option Turn Off FileVault.
restore Mac to factory settings
Image source – www.macworld.co.uk

Deactivate ICloud

From System Preference, click on iCloud and hit Sign Out Now. “Delete from Mac” needs to be clicked on to erase all your personal data.

Restart Your Mac Into Recovery Mode

We already mentioned before that you have to stay connected to the Internet during the whole process because Mac OS X needs to be installed from the Internet. Click on Apple, then Restart. Now hold down the R keys and command until you see the Recovery Mode Utilities Window.
Click Continue after selecting Disk Utility. Choose the main Startup Volume and click on Unmount. Select Erase tab and then click Erase in order to clean the hard drive. After this step is finished, select Disk Utility and click Quit Disk Utility to exit the program.
restore Mac to factory settings
Image source – apple.stackexchange.com

Install Mac OS X

Now ‘Re-install Mac OS X’ needs to be clicked on and continue. A blank copy of Mac OS X Mavericks will be downloaded and installed on your Mac. No need to enter the Apple ID, password and also skip the set up process. The person, who will buy this Mac, can do the rest.

How To Use Back To My Mac To Transfer Files

Back to My Mac is an apple software that comes with you Macintosh. It is a free software that provides free screen-sharing and allows you to remotely access your computer. It also gives you the facility of easily transferring your files from one Mac to another over internet securely. Another convenience that it provides you is that you can control your Mac at home remotely while you are not at home and can access your documents from wherever you are as long as you have the internet connectivity. The screen sharing option of Back to My Mac is a really useful feature which you can use to access your iMac from far away and see the screen of your remotely situated Mac on the Mac you are working with just as if you are sitting in front of the other Mac.
Here we’ll tell you how to use Back to My Mac to transfer files between computers. For that the first thing that you would need to do is to set up Back to my Mac.
Back to My Mac is a part of apple’s iCloud feature which you must already be aware of.
So for using Back to My Mac turn on iCloud.
How To Use Back To My Mac To Transfer Files
You must already be having iCloud set up on your computer. To check go to System Preferences and click on iCloud. You must be able to see your account information there. If you are unable to see that then it means that you are not logged in. So use your Apple id and password to log in to iCloud. If you don’t have an Apple id and password then you can easily create one. Once you are done with creating an id and logging into iCloud you would need to set up the Back to My Mac feature.
Now to get access to Back to my Mac to transfer files open iCloud. In the list you would see the option of Back to My mac. Click on the checkbox next to the Back to My Mac. Now your Back to My Mac feature is initiated.
So you are done setting up the Back to My Mac on your computer. Now let’s see how to use back to my mac to transfer files. Here is a step by step guide for that.
How To Use Back To My Mac To Transfer Files

Steps To Set Up Back To My Mac To Transfer Files

  • In File you will see the option of a New Finder Window. Click on that.
  • Now the Finder Window has been initiated. You will be able to see that on the sidebar at the left side. It should generally appear below the devices.
  • Click on the New Finder Window.
  • When you click on the New Finder Window, you must be able to see the option of Other Mac.
  • By clicking on the Other Mac you must be able to connect to the other Macintosh over internet.
  • Once the connection has been established you would be able to see the main folders of the connected computer.
  • From there you can access the files.
You have the option of opening them or copying them onto the device you are using from the other Mac.
So now you know how to set up Back to My Mac to transfer files from one computer to another. And the best part is that it’s free to use this feature to access your files remotely, or transfer files, or share the screen on another Mac.
One disadvantage the Apple’s Back to My Mac has is that it can only work with another Mac. You would not be able to connect a Windows PC using this feature. But what you can do is to connect your iPad or iPhone using this Back to My Mac feature. This can be done by using apps which are available on the Apple App Store.
You can turn off the Back to My Mac feature whenever you want. For doing this, go to system preferences in Menu. In that you’ll see iCloud. Click on that. Now go to iCloud preferences. In iCloud preferences you can just deselect the Back to My Mac to turn it off.

How to create a new Apple ID on your iPhone or iPad

New to the Apple ecosystem? Your first step is to sign up for an Apple ID.
An Apple ID makes it possible for you to download content from iTunes and the App Store. It also allows you to sync reminders, calendars, and contacts through iCloud, and activates FaceTime and iMessage across multiple devices. It's not mandatory to sign up for an Apple ID if you want to use an Apple device, but it is essential to getting the most out of your iPhone and iPad. Here's how you can create a new ID.

How to create a new Apple ID on your iPhone or iPad

  1. 1. Open the Settings app.
  2. 2. Tap iCloud.
  3. 3. Tap Create a new Apple ID.
    Creating a new Apple ID on iPhone
  4. 4. Enter a birth date.
  5. 5. Tap Next.
  6. 6. Enter your first and last name.
  7. 7. Tap Next.
  8. 8. Select your current email address or get a new iCloud email address.
    Entering birthday for new Apple ID on iPhone
  9. 9. Enter your email address.
  10. 10. Create a password.
  11. 11. Verify the password.
  12. 12. Select a security question.
  13. 13. Type in answer.
  14. 14. Repeat two more times.
    Entering security questions for new Apple ID on iPhone
  15. 15. Agree to the Terms and Conditions.
  16. 16. Tap Merge or Don't Merge to sync iCloud data from Safari, reminders, contacts and calendars.
  17. 17. Tap OK to confirm Find My iPhone is turned on.
    Merging iCloud with new Apple ID on iPhone

How to sign out of iCloud on your iPhone or iPad

  1. 1. Open the Settings app.
  2. 2. Tap iCloud.
  3. 3. Scroll down and tap Sign Out.
    Signing out of Apple ID on iPhone
  4. 4. Tap Sign Out to confirm that all Photo Stream photos and iCloud Drive content will be removed from this iPhone.
  5. 5. Tap Delete from My iPhone to confirm that all Notes stored in iCloud will be removed from this iPhone.
  6. 6. Select delete or keep iCloud calendars, Safari, reminders, and contacts on iPhone.
    Deleting iCloud from iPhone
  7. 7. enter password.
  8. 8. Tap Turn off.
    Turn off iCloud on iPhone

How to sign in to iCloud with an existing Apple ID on your iPhone or iPad

  1. 1. Open the Settings app.
  2. 2. Tap iCloud.
  3. 3. Enter the email address and password associated with your Apple ID.
  4. 4. Tap Sign In.Signing in to Apple ID on iPhone
  5. 5. Tap Merge or Don't Merge to sync iCloud data from Safari, reminders, contacts and calendars.
  6. 6. Tap OK to confirm Find My iPhone is turned on.
    Merging content in iCloud on iPhone

How To Fix IPad Pro Can’t Connect To Wi-Fi

Before Apple officially launched their iPad Pro, we could read many rumors about its design, display size, features, abilities, and the price. It was one of the main topics in the tablet world for a really long time, and it still is. While some would say it’s too bulky, the others praise the size of the screen, because now they can do so many things and complete a lot of tasks on your iPad, which makes it ideal for those who use it for work. There have not been many complaints about its performance, but one of the issues that popped up is related to Wi-Fi as some people reported the problem saying “iPad Pro can’t connect to Wi-Fi”. See the potential solutions below, and try them out.


Ways To Fix IPad Pro Can’t Connect To Wi-Fi

www.techradar.com

Solution No.1: Toggle Wi-Fi
Before you move to other, a bit more complicated options, try a few simple ones. The first thing you should do is toggle Wi-Fi, turn it off and back on. You may try this a few times to see what happens. When you are done, make sure the Wi-Fi is set to ON.

Solution No.2: Toggle Airplane mode
Next, toggle Airplane mode. Go to Settings, turn the Airplane mode on, wait for about 10 seconds and turn it back off. Many people think this is crazy, but they change their minds once they see this simple trick can solve the problem. Make sure to try this out!

Solution No.3: Restart your iPad Pro
Restart can be pretty effective as well. Sometimes, your precious iPad Pro needs a fresh start, and that is exactly what it will get after you turn it off and turn it back on.

Solution No.4: Restart your router
You should do the same thing with your router. Unplug it, wait for a couple of seconds and then plug it back in. Hopefully, you’ll be able to connect to a Wi-Fi network now.

Solution No.5: Make sure your router firmware is up to date
Often, the reason why the problem occurs is because the router firmware is not updated. Visit the manufacturers website, find your router model there, and see if there are any updated available.

Solution No.6: Disable MAC filtering
The problem can be fixed once the MAC (Multimedia access control) filtering is turned off on the router. The steps for this vary and depend on the router model, which is why you can Google this. Just type How to turn off, or how to disable MAC filtering followed by the model of your router.

Solution No.7: Reset network settings
To reset network settings on your iPad Pro, follow these steps:
  • Go to Settings
  • Tap General
  • Tap Reset
  • Click Reset network settings.

Solution No.8: Reset all settings
By doing this, your data won’t be deleted. Do the following:
  • Navigate to Settings
  • Tap General
  • Tap Reset
  • Click Reset all settings.

We hope that one of the solutions listed above worked for you and that your iPad Pro can connect to Wi-Fi now!

How To Download Instagram Videos On Android 2016

While Instagram does not comes with a feature to download pictures or video directly from their infrastructure. This is a concern by people who wants to download instagram videos. However, Instagram Does not give you a right click option  to save video or save Image as a  function, due to copyright and distributing   issues  .However there a a lot of ways inwhich you can download instagram videos on your samsung galaxy s3, samsung galaxy s4 or even Your nexus 5 phone. As long It’s an android Phone this method that’ll be present to you will work .In this article i will show you a easy and simple way to download instagram Videoson android

How To Download Instagram On Android


To download Instagram Videos for free on you Android Phone , please follow the method below :
Cover art
>When you downloaded the instagram video downloader from google play. Wait for it to install. After it has successfully install
>Open The app
> Go to the Video that you want to download and copy it’s URL. You can Copy the URL by clicking the 3 dots at the side of the video , As shown in the picture below
   Video Downloader for Instagram- screenshot
>An the screen appear to download Instagram videos on your Android Phone , copy the URL .
If you are not able to Copy the URL, use a Desktop or a laptop and save the URL. Then paste it into the box
   Video Downloader for Instagram- screenshot
>After you have Copy The share URL video. You are close to download the Instagram video on your Android 

>Navigate to the Instagram Video Downloader
>Swipe left on the Download Post Tab
>In the URL Box, Paste The Url in the Box and click download

That is all you need to download videos on your samsung galaxy s3, samsung galaxy s4 or your samsung galaxy s5